R - Distill + github pages 로 간단한 블로그 만들기
R markdown 형식을 html 로 변환해 호스팅하는 패키지로 blogdown 이 유명했는데 최근 많은 유저들이 distill 로 많이 갈아타고 있는듯하다. blogdown 의 경우 hugo 를 기본으로 블로그 템플릿이 만들어지는데 hugo 보다 distill 의 기본 포맷이 조금 더 학술적인 느낌이기 때문에 개인적으로 distill 이 R 관련 포스팅에 좀 더 적합한 느낌으로 보인다.
Distill Manual : https://rstudio.github.io/distill/blog.html
The Distillery: Distill 매뉴얼은 조금 드라이하게 작성 되어 있는듯하다. distill 사용을 좀 더 잘하기 위한 tip 등을 공유하는 사이트로 The Distillery 가 있다. (https://distillery.rbind.io/tips_and_tricks) 여기에서는 Distill 을 사용할 때의 tips and tricks 와 showcase 를 공유한다. showcase 를 보면 다른 유저들이 distill 을 이용해서 블로그를 어떻게 운영하고 있는지를 볼 수 있어 개인 블로그를 만드는데 참고가 될 것이다.
간단하게 Distill 과 Github pages 를 통해 10분 이내로 블로그를 만들어보자.
물론 github 계정, git 설치, R 설치는 기본적으로 필요하다.
Distill 설치
install.packages('distill')
Distill Blog Project 생성

위와 같이 블로그를 생성하면 홈폴더 바로 아래에 있는 하위 폴더에 "_site" 라는 폴더가 있는데 여기에 웹사이트 최초 시작지점인 index.html 파일이 존재한다. 이렇게 github pages 로 push 하면 [githubID].github.io/_site 가 블로그의 주소가 된다. 만약 [githubId].github.io 를 주소로 블로그를 호스팅하고 싶다면, _site 에 위치한 파일들을 모두 home 폴더로 옮겨준다. 그리고 홈폴더 바로 아래에 있는 _site.yaml 파일의 output_dir 을 "." 으로 설정한다.
_site.yaml 파일은 다음과 같이 될 것이다.
name: "[id].github.io"
title: "My Blog"
description: |
  My Blog
output_dir: "."
navbar:
  right:
    - text: "Home"
      href: index.html
    - text: "About"
      href: about.html
output: distill::distill_article
collections:
  posts:
    categories: true
    categories_metadata: true
    authors_metadata: true
본인의 github 에 [id].github.io 라는 이름의 레포지토리를 만들고 여기에 만든 코드를 push 를 해주면 블로그가 잘 생성된 것을 볼 수 있다. github pages 로 푸시하는 과정은 아래와 같다.
cd [home] # 생성한 distill 프로젝트의 홈폴더로 이동한다.
git init
git add --all
git commit -m 'first commit'
git remote add origin https://github.com/[id]/[id].github.io
git push origin master
아래와 같은 형태의 기본 Distill 템플릿의 블로그가 생성되었다.

* 또는 output_dir 을 docs 로 설정한 후, github pages 설정에서 source 폴더를 docs 폴더로 설정하는 것을 추천한다.

포스트 조금 수정해보기
1) 포스트에 카테고리 붙이기
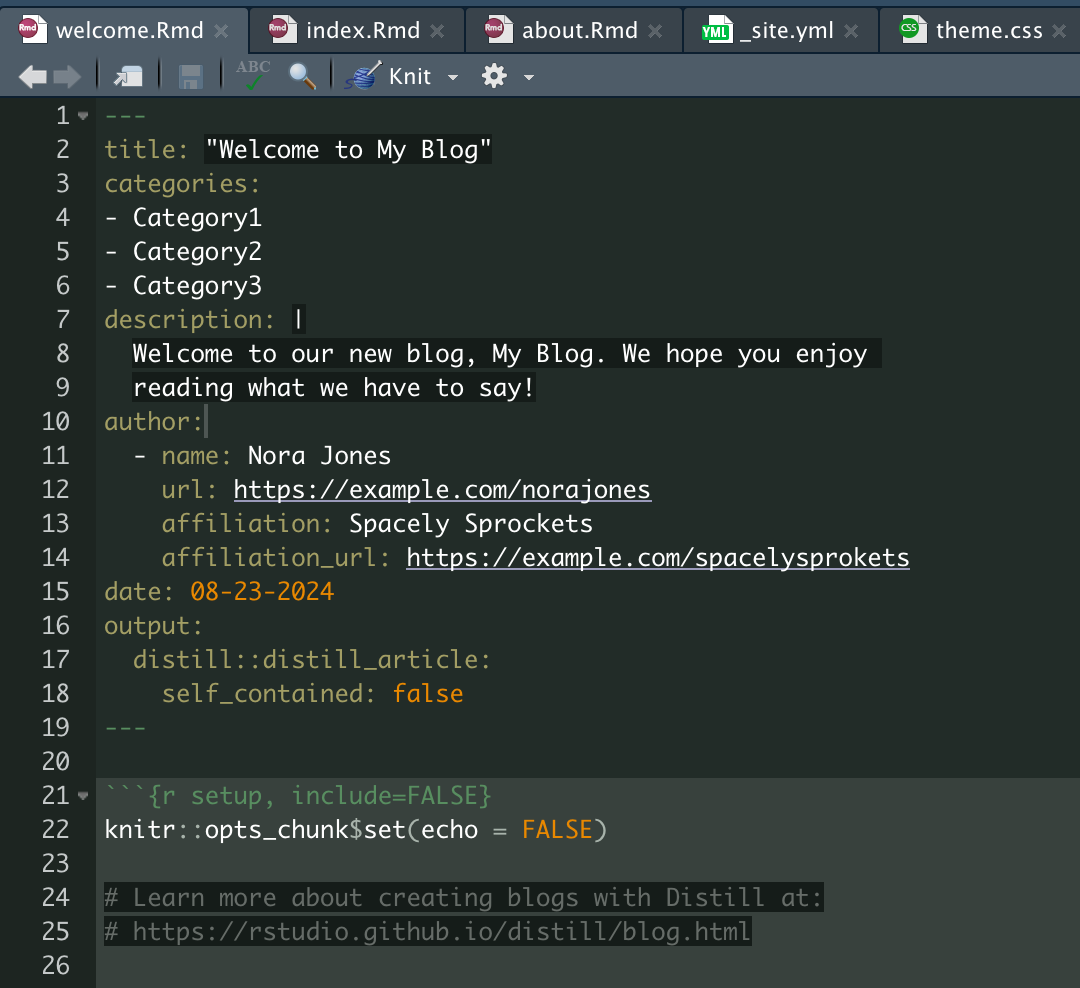
기본적인 블로그에는 오른쪽의 CATEGORIES 메뉴가 없을 것이다. 카테고리를 만드는 방법은 단순히 포스트에 다가 category tag 를 붙이면된다. 카테고리를 직접적으로 지정할 필요없이 포스트에 붙어 있는 태그를 통해 전체 카테고리가 재구성된다.
---
title: "Welcome to My Blog"
categories:
- Category1
- Category2
- Category3
description: |
  Welcome to our new blog, My Blog. We hope you enjoy
  reading what we have to say!
author:
  - name: Nora Jones
    url: https://example.com/norajones
    affiliation: Spacely Sprockets
    affiliation_url: https://example.com/spacelysprokets
date: 08-23-2024
output:
  distill::distill_article:
    self_contained: false
---
2) rmd 를 html 형식으로 변환하기
- 카테고리를 붙이는 등 rmd 파일을 수정했다면 이를 html 로 변환해줄 필요가 있다.
- 기본적으로 rstudio 에서 build - Install and Restart 를 누르면 빌드된다.
- 다만 build 를 통해서는 각 포스트가 html 로 변환되지는 않는다. 포스트를 변환하기 위해서는 각 rmd 파일에 대해 knitr 을 실행해서 rmd 파일을 html 파일로 변환해주면 된다.

Knit 를 통해 rmd 파일을 html 파일로 변환함으로써 github pages 를 통해 호스팅할 수 있다.
'Tools > R' 카테고리의 다른 글
| sparklyr distinct count with condition (0) | 2025.04.25 |
|---|---|
| R studio server 에서 knitr 에러 발생시 해결 방법 (0) | 2024.09.03 |
| R - ggplot 의 유용한 add-on 패키지 ggrepel (0) | 2024.08.22 |
| R - code snippet 특정 이름 패턴 파일들을 읽어 합치기 (0) | 2024.08.02 |
| R 로 벤다이어그램을 그려보자 VennDiagram 패키지 (0) | 2024.06.21 |
